The casserole bubbles invitingly, the coals underneath glow brightly as the aroma fills the air around the campfire. Your mouth is watering in anticipation of that first bite of Chuck Wagon Casserole. Welcome to the delightful and delicious world of Dutch-oven cooking; it doesn’t get much better than this.
A well seasoned Dutch oven is a beautiful thing. An Englishman by the name of Abraham Darby saw them being made in the Netherlands, had the process patented and began manufacturing them for the new American colonies. As pioneers of all sorts trekked across the new American frontier, they took these practical pieces with them and developed “leather glove cuisine” into fine art. Today, Dutch ovens are still holding their own.
A Dutch oven has personality and it’s one of the most versatile cooking implements you’ll ever use. Hence it’s enduring popularity. Even today it basks in the reflected glory of such famous patrons as Lewis and Clark, who traveled with their Dutch oven as they canoed down rivers and tramped through forests and fields in the early 1800s. Dutch ovens were considered so valuable that George Washington’s mother willed her “iron kitchen furniture” to a nephew. Paul Revere, folk hero and skilled craftsman, is credited with the design of the flanged lid so necessary to the Dutch oven. This flanged lid adds to the utility of the oven and is an integral part of the cooking experience.
Choosing Your Dutch Oven
For outdoor cooking, get the oven with the three stubby legs on the bottom and the flanged lid; these are also known as “camp ovens”. The space created by the three legs is where you’ll place your ring of charcoal. You’ll also place a layer of charcoal on the flanged lid, thus helping to keep the heat inside your oven for cooking purposes. When you go to the store to buy your Dutch oven, remember these five points:
- Get the kind of Dutch oven that has the three stubby legs on the bottom. The legs will keep the oven up out of the fire and make for a more even cooking experience with fewer hot spots.
- Check out the lid; does it fit securely all the way around with no gaps? A tight-fitting lid will do much to keep in the heat and produce better tasting food. Remedy for a badly fitting lid: apply some valve grinding compound to the rim of your oven and also to the edge of the lid, rotate the lid until you have a good fit.
- Look at the casting of the metal; it should be pretty close to the same thickness all around the oven. Thin areas will cause hot and cold spots during heating and cooling, resulting in overcooked or undercooked food.
- Only buy an oven that has a loop handle made of wire attached to the lid; you’ll need this to lift your oven out of the fire safely.
- Test out the bail, (the wire handle). Make sure it’s strong enough to lift the pot and that it moves easily back and forth
Dutch ovens come in a range of sizes; one of the most popular being 12 inches since it‘s so easy to handle. I bought a 12-inch for my first one, and later added larger sizes that I use when cooking for large gatherings.
Servings Per Dutch Oven (Approximate)
- 8″ Dutch oven: 1-2 people
- 10″ Dutch oven: 4-7
- 12″ Dutch oven: 12-14
- 12″ deep Dutch oven: 16-20
- 14″ Dutch oven: 16-20
- 14″ deep Dutch oven: 22-28

Priming a New Dutch Oven
Your new Dutch oven will come from the factory with a protective coating of wax or oil; if you leave this coating on it will give your food a very funky taste. Remove it by giving your oven a good bath in hot soapy water using a scrub pad to remove all of the factory residue. Then dry it quickly and thoroughly so it won’t rust.
Note: This is the only time most people use soap on their ovens; many Dutch oven users consider it a sin to ever use soap on one, so this is your call, but using it just this once is probably okay.
Seasoning a Dutch Oven
Seasoning your oven is a very important step. By doing this you’ll begin creating the ultimate non-stick coating that will last the entire life of your Dutch oven. The first step is to grease your oven, including the lid and the legs by applying a thin coat of lard or vegetable oil; don’t use butter, margarine, or salad oil. You can apply this coating to a warm or cold oven; if you want to apply it to a warm oven, then heat your home oven to about 200 degrees, and while it’s hot, pour in a small amount of vegetable oil or melted shortening. If you apply the oil to a heated oven, be sure to wear leather gloves or oven mitts when you rub in the oil to avoid getting burned.
Now you’re going to bake your Dutch oven, lid ajar, in your home oven at 350 degrees for one hour; you can expect a strange odor and some smoke, so don’t be alarmed. After your Dutch oven has cooked for one hour, remove it. When it’s just warm to the touch, apply another thin coat of oil and let it bake for another hour; repeat this process once more and you’ll have a perfectly seasoned oven. Each time you cook in your Dutch oven thereafter, you’ll be building up layers toward the ultimate “Teflon” coating that will last a lifetime.
Tip: If you use too much oil during seasoning, your oven will have a rancid smell. The treatment for this is to heat up your Dutch oven and wipe out any excess oil you see pooled in the bottom of the oven.
Cleaning a Dutch Oven
When it comes to cleaning a Dutch oven, aficionados will swear up and down that their way is the best way. Scraping the food residue off with a sturdy plastic spatula and then giving your oven a quick rinse in very hot water works well. Another method includes burning off leftover food, which is great if you’re cooking in the great outdoors, but not too practical at home. Other Dutch-oven cooks will give their ovens a bath in hot, soapy water; a subject of great debate, as I’ve mentioned earlier.
Whatever technique suits you, remember to always use plastic, wood, or silicone utensils so you won’t ruin your ovens’ seasoning. After each use, clean it and give it a thin coat of oil to maintain it’s sweetness and seasoning. If you’ve rescued an old, rusty oven from a yard sale, thrift store, or someone’s attic, clean it by scouring it inside and out with fine-grade sandpaper. Give the oven a good bath in hot, soapy water, dry it well, and you’re ready to get cookin’.
Necessary Gear for Dutch-Oven Cooking & Baking
You’ll need to make a modest investment in the following items to ensure your Dutch-oven cooking experience is a safe and satisfying one:
- Leather gloves: loose-fitting welding gloves are good. Wear them whenever you cook in your oven to help prevent painful burns.
- Lid lifter: to lift the hot lid of your Dutch oven.
- Lid holder: this you can improvise or purchase. It’s simply something to place your lid on when you remove it to check on your food, add seasoning, etc.
- Long-handled tongs: you’ll need these to add and remove the hot briquettes to the base and lid of your oven.
- Small shovel: a garden shovel, fireplace shovel or camp shovel is great for moving and burying charcoal and ashes.
- Whisk broom: you’ll need this to brush ashes off of your oven so you can serve ash-free food.
The Dutch-Oven Cooking Formula
Dutch-oven cooking is very labor-intensive; you have to stay involved to make it work, but there’s a formula to Dutch-oven cooking and it involves a little simple math. For example with a 12” oven, you’ll put 15 briquettes on top and 9 on the bottom. In other words, you’re adding 3 charcoal briquettes to the top of your oven, 12 plus 3, and subtracting 3 from the bottom, 12 minus 3. This combination will keep the temperature in the oven around 325 to 350 degrees; with practice, you’ll learn how to increase and decrease the heat for different recipes. Each time you add or subtract 2 coals to the top or the bottom, your oven’s temperature is affected by 25 degrees; outside conditions like wind, sun and heat will also affect your oven.

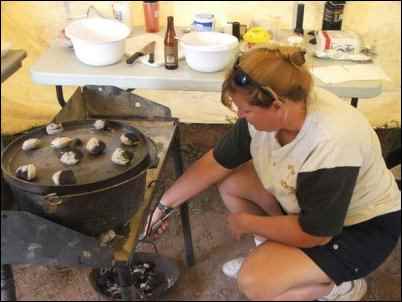
When using charcoal briquettes, get them going about 15 minutes before you place your Dutch oven on them. You’ll control the heat in your oven by the number of briquettes you use; arrange them in a circle under your oven about 1/2 inch inside the oven’s edge. Put briquettes on the oven’s lid in a checkerboard pattern. Don’t bunch them up as this will cause “hot spots” and burn your food. It’s also a good idea to lift and rotate your oven 1/4 turn every 15 minutes, then rotate the lid 1/4 in the opposite direction every so often. This will prevent hot spots and produce more even cooking and better-tasting food.
Dutch-Oven Baking Chart
- 8” oven: 10-11 coals on top, 5-6 on bottom
- 10” oven: 13 coals on top, 7 on bottom
- 12” oven: 15 coals on top, 9 on bottom
- 14” oven: 17 coals on top, 11 on bottom
- 16” oven: 19 coals on top, 13 on bottom
 Dutch-oven cooking is very versatile; you can bake, roast, boil, stew, and even deep fry. You can cook everything from Beef Burgundy to Apple Crisp, and when you taste what can come out of a properly cooked Dutch-oven supper, you’ll know it’s worth all the effort. Liquid dishes like soups and stews need more heat on the bottom than on the lid. Put two-thirds of your coals on the bottom and one-third on the top. Meats, potatoes, vegetables, and cobblers will need equal heat distribution, so the same amount of coals can go on the top as on the bottom.
Cakes, breads, biscuits, and cookies need more heat on the top, so put two-thirds of your coals on the top and one-third on the bottom. To keep the bottom from burning, remove your oven from the heat when your recipe is two-thirds of the way done; the heat of the coals on top will finish the cooking.
Some Dutch Oven Don’ts:
- Don’t let your Dutch oven sit in water, it will rust.
- Don’t use soap on it except for the initial cleaning after you buy it.
- Don’t use metal utensils on your oven.
- Don’t place an empty Dutch oven over a hot fire; it might crack.
- Don’t put cold liquid into a Dutch oven; it might crack.
- Don’t get in a hurry to heat up your Dutch oven; this will burn the food and damage the oven.
Favorite Dutch Oven Recipes
Mountain Man Breakfast
- 1 lb. bacon
- 2 medium yellow onions, diced
- 1 ½ cups fresh mushrooms, sliced
- 1 green bell pepper, diced
- 3 cloves garlic, minced
- 12-12 medium potatoes, sliced
- 12 eggs, beaten
- Salt and pepper to taste
- 3 cups grated cheddar cheese
- Picante sauce to taste
Heat your 12″ Dutch oven. Cut bacon into 1-inch slices and fry in the oven until brown. Add onion, mushrooms, and bell pepper and sauté until onions are translucent. Add your potatoes and season with salt and pepper.
Cover and bake top for 30 minutes. Season eggs with salt and pepper then pour eggs over the top of potatoes. Cover and bake another 20 minutes, stirring gently every 5 minutes. When the eggs are done, cover them with cheese and replace the lid. Let stand until cheese is melted.
Serve topped with picante sauce. Serves: 10-12
Dutch Oven Baked Beans
 1 two-pound can pork & beans
- 1/4 cup mustard
- 4 slices of bacon
- 1/4 cup ketchup
- 1 chopped onion
- 1/8 cup cider vinegar
- 1/2 cup brown sugar
 1 two-pound can pork & beans
Mix beans thoroughly with onion, brown sugar, mustard, ketchup, and vinegar.
Pour into Dutch oven and place bacon on top of beans. Cover and cook at 350 degrees at least 1 hour. Serves 8 to10.
Fizzy Fruit Cobbler
- Apple pie filling
- 1 box yellow cake mix
- 1/2 can lemon-lime soda
- 1 Tbsp. cinnamon
Any combination of flavors that sound good to you can be tried. This example is apple, yellow cake, and cinnamon. Another might be cherry filling, chocolate cake, and powdered sugar. Or, blueberry filling, white cake, and grape soda.
Line the Dutch oven with aluminum foil to make clean up easier if you are averse to doing that. Pour the fruit filling into the bottom of the oven.
Sprinkle the cake mix on top of the filing—do not stir it.
Pour the soda on top of the mix from a low height so it does not splatter all over.
With a fork, mix the soda into the cake mix, being careful not to mix it into the filling too much—a little is ok.
When the cake mix is stirred, sprinkle cinnamon on top. Cook for 45 minutes at 325 degrees.
You don’t have to be camping out to use your Dutch oven. When you cook at home, just treat it pretty much like any of your casserole dishes or cooking pots, remembering that it gets a lot hotter and is a lot heavier. An oven with no legs is more convenient for home use. Dutch-oven cooking is a great experience, whether you do it indoors or out. You’re following in the footsteps of our ancestors when you practice the art of “leather glove cuisine.”
References
International Dutch Oven Society