Homesteaders are a resourceful and imaginative group. If you need a tool, a fixture, an egg or heating fuel, there’s that innate drive to make it, design it, produce it, or cut it yourself. Many of us could just go out and buy it and be done with it but I think it has something to do with substance, the drive to be more self-sufficient or the feeling of accomplishment and self-respect from burdening no one and doing it yourself. There’s not a homesteader on the planet that hasn’t said with pride “My home-grown tomatoes are so much better than store-bought ones, and so much better for me as well.” You’ll hear the same about homebrew beer.
Armed with a little information, some materials, and enough of a desire, what we can do for ourselves, at some time or other, we end up doing. And more often than not, we are better folks for it. Rarely will a homesteader hesitate to expand the boundaries of experience beyond past “excursions to the limit”. So let’s push the envelope once again and take that next step to self-sufficiency and make our own homebrew beer or ale. We’ll cut out the commercial big guys, we’ll cheat the government out of some alcohol tax revenue. In the process, we’ll free more than a million yeast cells from imprisonment in a dark foil packet so they can spend their entire lives productively fermenting something worthwhile instead of just hanging around making food go putrid. Best of all, we’ll satisfy our own taste buds. No more will the lack of choice dictate what we consume. Geez, I already feel good about myself and haven’t even started!
Are you ready to homebrew beer?
“Why I go mad just waiting!” I hear you say.
So, let’s just jump right in and make some mighty-fine, tax-free beer!
Here are two simple recipes to begin with. The first uses an ingredient kit to make a lager-style beer, refreshing, light-bodied with just a touch of bitterness to give it a clean, crisp taste. The alcohol content will be about 5.3%. The second recipe uses standard, grocery-store-available malt extract and produces a medium-bodied amber beer. It will be slightly stronger in taste with a heavier, malty flavor. Its alcohol content will be about the same as the first recipe. In the reference section there is a link to a process for removing most of the alcohol from the brew should you decide to go that route. There’s also plenty of information on advanced brewing techniques so be sure to check the references out.
It has been my experience with the grocery store-bought malt extract, although convenient and capable of a mighty-fine brew, it doesn’t compare with the quality brew that a good kit will produce. Still, it is a fine tasting brew, easily adjustable to your palette and highly recommended. It leaves the door wide open for experimentation. To start, however, I’d recommend using an ingredient kit for your first batch and then do some experimenting on your own thereafter. You can hardly go wrong.
What You’ll Need:
Homebrewing Equipment
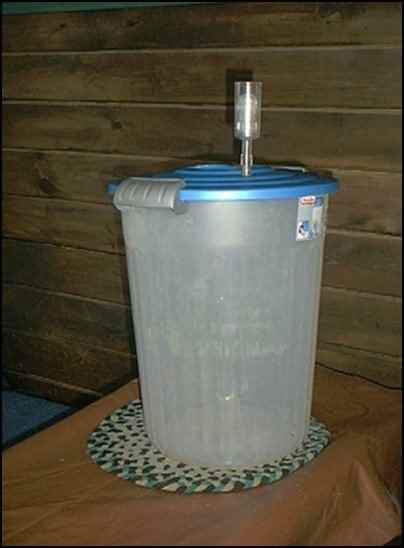
- Fermenting Vessel (Primary Fermenter): A 5- to 6-gallon plastic bucket with a lid, preferably food grade. I use a 6-gallon trash bin (never used for trash, I might add) from Wal-Mart for around $7 and it came with a tight-fitting and locking lid. I drilled a 1/2” hole in the lid to accommodate an airlock (see below). It’s a good idea to first measure and mark the 5 and 6-gallon heights on the fermenter for reference.
- Air Lock:
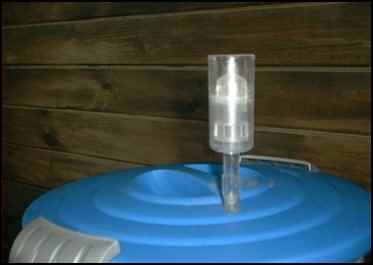 This is a device for allowing the fermentation gases to escape while keeping air from entering the fermenter. It costs about $5 from a homebrew supply store but you can substitute 1/2” plastic tubing, stick one end in the drilled hole of the cap and run the other into a jar of water to keep air and unwanted natural yeasts from entering the fermenter during fermentation.
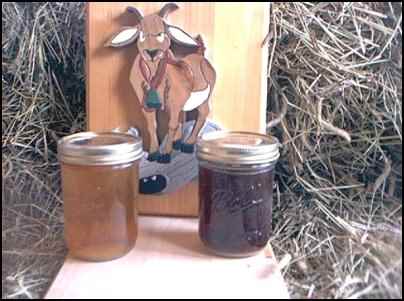
 - Bottles and Caps: If you are going to bottle your homebrew for aging, a good capper and quality bottle caps are a must. I circumvent this by using Mason jars as bottles. Occasionally I’ll transfer part of the brew to a 1- or 2-gallon dispensing carboy instead of bottling. The carboy will hold a slight carbonization pressure and with that setup, I am able to draw off a mug whenever I want. The carboy held brew is not quite as carbonated as bottled beer but it’s still a refreshing way to grab a single mug.
- Hydrometer (optional but highly recommended): This is a device for measuring the specific gravity of your fermenting liquor. The reading obtained relates to the remaining unfermented sugars in your brew. Under certain circumstances, it can be used to determine the alcohol content of your brew but more so to tell you when it is safe to bottle your beer.
- Stainless Steel or Enamel Pot, 1 to 1-1/2 gallon
- Long Handle Wooden Spoon (some purists frown on wooden gear, I use it regularly)
- Bottle Brush (if required)
- Labels (optional) for your bottles
- Mug… or two or three for you and your friends
- Plastic Tubing for siphoning
Homebrewing Ingredients
- Ingredient kit
–OR–
- Malt extract – hop flavored or unflavored
- Dry malt or sugar
- Brewer’s yeast
- Additional hops (optional)
- Gelatin, plain (optional)
- Water
Homebrew Beer Recipes
Both recipes use the same overall procedure. I will note any differences in the procedure as they apply.
Cooper’s Lager Beer Kit:
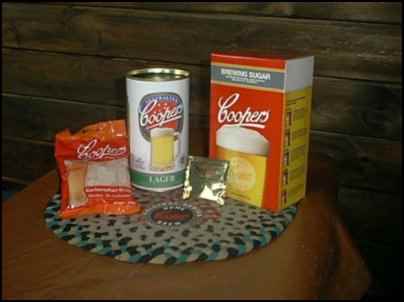
The Cooper’s Lager Beer Kit comes with 1 large can of hop flavored malt extract, a dried yeast packet, 1 kg. of corn sugar and a bag of priming sugar tablets for bottling. It is all you need (except bottles and caps) to get going on a 5-gallon batch of homebrew, although you could use a teaspoon of plain gelatin to help in clarifying the beer just before bottling.
Medium Body Amber Beer or Ale:
- 2 cans of grocery store hop flavored light malt extract (1 kg ea or 2.2 lbs.)
- 1 lb. of sugar (corn sugar is best, cane sugar will do) or another can of malt extract for a heavier bodied brew and no extra sugar except for bottling. I used two 2.2 lb cans of malt and 1 lb. of corn sugar. Figure on using around 1 lb. of malt or sugar for each gallon of brew.
- 1 packet of beer or ale yeast. I used an ale yeast for my brew. The yeast that usually comes with the malt extract from the store is beer yeast and will be suitable for this recipe as well.
- Additional half-teaspoon of sugar for each bottle during the bottling stage.
- 1 teaspoon of plain gelatin for clarifying the beer (optional)
- 1/2 oz of additional hop pellets (optional)
Preparation
1. Clean the fermenter and sanitize the spoon. I use 1/2 cup of unscented bleach in 2 gallons of water and splash it around the fermenter for a few minutes. Then rinse well with clean water. Never use soap or detergent for cleaning the beer-making equipment as it can leave a microscopic film that will adversely affect both the taste and the head retention properties of the final brew.
2. Load the fermenter with 5 gallons of clean water, preferably soft water although hard water will do but has a deleterious effect on the beer’s head retention properties.
3. Heat 1 to 1.5 gallons of this water in a stainless steel or enamel pot. You do not have to reach a boil unless you are adding your own hops. (See the Hops section for more information). If you plan to add extra hops, bring the wort to a boil after step 5.
4. Add the malt extract to the hot water while stirring. The malt will sink to the bottom in a lump. The stirring will keep the malt from scorching until it is dissolved. The cooking broth is referred to as the ‘wort’.
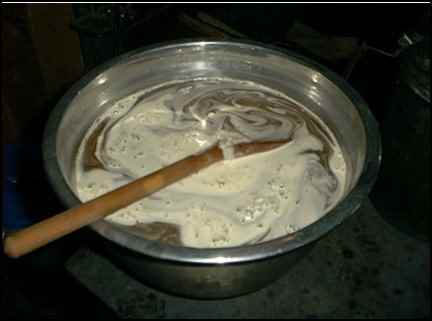
5. Add the entire package of corn sugar (kit recipe) or for the medium body beer recipe add the extra can of malt or plain sugar and stir again.
6. (Optional) If you are adding extra hops you can add them now. Bring the wort to a boil for 1/2 hour or longer depending on how bitter you like your brew to taste. If you are using hops for aroma only, then add the hops at a later stage of the boiling cycle, say for the last 15 minutes of the heating cycle. You may also opt to strain the wort before adding to the primary fermenter but it is really not necessary.
7. If you are not adding hops, heat below a boil for 1 hour to ensure all the sugars from the extract are dissolved.
8. While the wort is steeping, rehydrate the dried yeast by slowly pouring the yeast into one cup of warm (not hot) water and slightly agitate the jar. Do not stir it. Let the yeast solution sit for 15 minutes or longer until the wort is ready. In about 15 minutes, the top of the yeast-laden water may look creamy as the yeast reactivates.
9. After the wort has been heated for an hour or more, remove it from the heater and pour it back into the primary fermenter into the remaining cool water. Top off with cold water to make 5 gallons.
10. Take a hydrometer reading according to the directions that came with the hydrometer. Record the reading for future reference. It should read somewhere around 1.040 to 1.042.
11. Check the temperature. If it is below 70F (21C), add the hydrated yeast solution.
12. Cover the fermenter with the lid and add the airlock.
Fermenting Your Homebrew Beer
13. After one or two days you’ll notice a cream-colored white foam on the top of the liquid. More so if you are brewing an ale. There will also be a heavier deposit which may or may not be visible on the bottom of the vessel. This is the sign that all is going well and the fermentation is well underway. Patience is the key ingredient now. Ten to fourteen days of it.
14. After a week, when the foam on the top of the beer begins to subside (it probably won’t go away entirely) you can, if you choose to, add a teaspoon of plain gelatin or “finings” as it is referred to in the homebrew supply stores. It is not necessary and is not included in an ingredient kit but it aids in the clarifying of the final brew. It is not necessary with darker beers.
15. After a week in the primary fermenter, every two days, withdraw enough brew to make a hydrometer reading. You may, of course, drink the remains after the test to prove to yourself that your beer is improving each and every day. Depending on many factors most important of which is the fermentation temperature, after about 10 days the specific gravity reading from the hydrometer should decrease to around 1.006 to 1.004, maybe even less. Keep fermenting until the specific gravity reading stops falling and holds steady for at least two days. At this point, the brew is ready for bottling or casking. If you are not using a hydrometer, ferment the beer for at least 14 days to make sure it is ready for bottling.
Note: At this point you can get an idea of the approximate alcohol content (by volume) for your brew using the original specific gravity reading (OG) and the final specific gravity reading (FG) from the formula below:
Approx Alcohol Content = [(SG-OG) x (1000/7.46)] + 0.5
The 0.5 at the end of the formula represents the approximate alcohol content added to the brew from the use of priming sugar at bottling time.
Homebrew Bottling
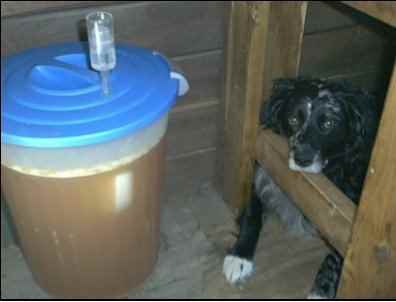
The kit comes with sugar drops for priming the bottles. Without the kit you need to add 1/2 teaspoon of sugar to each 12 oz. bottle. Some recipes suggest 1 teaspoon for each bottle. I prefer to err on the less gassy side and use 1/2 teaspoon. The priming sugar is what produces the carbonation to the beer as the fermentation proceeds a bit more while in the bottle. Carbon dioxide produced during this secondary fermentation adds the sparkle to your brew and leaves a light sediment deposit at the bottom of the bottle. The sediment will normally adhere sufficiently to the bottom of the bottle but careful decanting during the imbibing stage will yield a clear poured mug of your prized beer. The adherence of the sediment is a property of the yeast you use and is called flocculation. No doubt I would have been spanked for saying that word when I was kid, but within brewing circles, I feel linguistically unencumbered. I never fail to point out how well flocculated my homebrew turns out and I haven’t been spanked since I started brewing my own.
Caution: Bottling is a critical stage. If you add too much sugar during the bottling stage you can, and most likely will, burst the bottles or at best, blow the caps off the bottle during aging. This is a very dangerous situation. A bursting bottle can hurl glass fragments that can cause injury or death. It can imbed glass fragments in walls. In earlier beer making episodes I have seen bottle caps blow off and imbed into the ceiling. I have also ruined carpets and scared the bejesus out of myself and others. Of course, I’m divorced now . . . so enough said. Use care here. Remember, other than injury, there’s nothing worse than having to lick the beer off the ceiling.
16. Add one priming sugar drop to each bottle. One drop equates to 1/2 teaspoon of sugar.
17. Position the fermenter so that you can siphon the beer without disturbing the now heavy deposit on the bottom of the vessel. Insert a proper length of clean plastic tubing and begin to siphon the liquid to fill each bottle. Having some kind of shut off valve or pinching device on the tubing helps to avoid a mess. Fill each bottle leaving a 2” space at the top. Don’t let the siphon draw from the very bottom or you’ll disturb the sediment layer and cloud your beer.
18. Use the capper to securely crimp each cap to the filled bottle. You can cap as you go or wait until all the bottles are filled and then cap. Once again, I use clean and sanitized Mason jars for this and it works adequately.
19. Tip each bottle upside down several times to wet the seal.
Aging Your Homebrew
The aging process, sometimes referred to as “lagering”, depends heavily on the style of beer and the storage temperature. Lager-style beers generally benefit from longer storage at cooler temperatures. Typically anywhere from 2 weeks to 3 months is used. but patience often eludes me and I have never been able to ‘lager’ a beer longer than 4 weeks. “Oh God, deliver me patience” I pray. But patience never comes and the consumption phase begins for me 2 weeks without deleterious effects even though it is slightly before its peak flavor.
20. Store the bottles upright in a safe place preferably cool and certainly protected from the potential of an explosion.
21. I haven’t been into a drinking establishment for over 20 years so I haven’t seen these around for a while but it used to be that you could get heavy cartons with individual slots for each bottle. These helped somewhat in protecting adjacent bottles from getting destroyed if the next bottle over from it exploded.
Homebrew Consumption
Not too much to say here except use care when dispensing the beer from the bottle into a clean (non-detergent washed) mug so as not to disturb the slight sediment resulting from the secondary fermentation that took place in the bottle. The sediment won’t hurt you, in fact it is quite healthy. Compare the price of Brewer’s Yeast at the pharmacy. Then rejoice knowing that you have some at the bottom of each and every bottle.
Finally, I won’t expound about the dangers of alcohol and driving or use thereof during other life activities that require full attention, normal unimpaired judgment and attitude control. There are real dangers associated with drinking alcohol, you know about them and so do I. Drink responsibly, live respectfully. Obey the drinking laws and never allow underage drinking.
Where to Go From Here
With a kit beer, it’s hard to make a bad beer or ale. It’s just that simple. The only problem is that there are only so many beer styles for which kits are available. Perhaps you have a favorite beer, ale, stout or whatever, that you would like to emulate on your own and make yourself. You can, and there are recipes available for emulating many popular and not-so-popular commercial brews. Experimenting is part of the fun. See the reference section at the end for a listing.
The real challenge in homebrewing is two-fold: first to prepare a great-tasting brew that is just like your favorite commercially available one or perhaps to have some good Scottish ale without footing a costly trip to a pub in Scotland. With today’s kits and sufficient experience, that’s not too hard to do. Secondly, and this is the most challenging task for the home-brewer, to be able to faithfully reproduce a batch you have previously produced that you liked. As you get more involved in homebrewing, you’ll develop a healthy respect for the quality control that goes into commercial brewing. It’s simply astounding how a big brewery can make a product that tastes the same over the span of millions of cans or bottles.
To be able to experiment successfully without ending up making a batch of malt vinegar or something so vile you relabel it and use it as “slug bait” (beer, good or bad, works like a charm to trap slugs), it helps to know a little about the ingredients and how they interact as well as the fermentation process itself. As you gain confidence with your brewing skills you will certainly opt for using more advanced methods like mashing your own malt, all-grain brews, adding hops directly and maybe even better temperature control. Let’s take a look at some of the variables.
Malt. Most beer is made from barley although other grains like wheat, sorghum, oats, and others are used to a lesser extent. Barley is the grain of choice because it has a high starch content and through the use of its own enzymatic action, can produce an abundance of sugars of varying kinds and fermentability. To be useful for brewing the grain is malted, crushed and then dehydrated and stored. It may be made into a malt extract or sold as processed grain.
Malting. In the malting process, the grain is allowed to germinate to produce the necessary enzymes. The enzymes begin the task of sugar conversion, but by no means complete it before the germination is forcibly stopped as the grain is kilned. Various heating cycles are used to produce the different malt styles (pale, amber, dark, crystal, etc.). At this stage, the dried malt is rolled and cracked open and stored until needed.
Mashing. The next critical stage for the grain on its way to becoming beer is the mashing process. In this phase, the grain is mixed with water and heated through a range of temperatures and times to suit the brew. The mashing process resumes the starch to sugar conversion as the dormant enzymes burst back into activity in the aqueous and thermal environment of the mash. The range of sugars produced in this step is responsible for the overall body of the brew and exerts a major influence on the ultimate flavor of the beer. The mashing process affords tremendous potential control for the homebrewer. It determines the complex sugars that will be available for fermentation. Mashing requires reasonable temperature control but is well worth looking into if you are going to take the next step towards perfection.
Mashing is not difficult, it’s actually quite fun. I haven’t mashed my own malt since the late 70’s but when I did, it made a world of difference. These days, being equipped with only a woodstove for cooking, I opt not to mash my own malt anymore. For me, it would mean judicious monitoring of the temperature; moving the mash around on the stovetop so as to keep it from over or under heating and hanging around the stove for the several hours it takes to complete the starch to sugar conversion. Worse than that, it would mean cleaning up a sticky mess if I have a brain freeze and the mash boils over onto the woodstove and ultimately sticking to the floor. I also foresee the likelihood of lighting my pants on fire through intimate contact with my primitive but cozy thermal environment of choice. Nah, I may be a slave to my animals and morning coffee, but I refuse to become a slave to the wort. Hence, I opt for brewing with malt extract. It is simpler, less of a mess, no hot pants, and still lots of choices.
Malt Extract. The malt extract is a refined malt syrup that has already gone through the mashing stage. It does not require any ubiquitous temperature control beyond making sure the wort doesn’t boil over or scorch; and this heating cycle is much shorter, closer to the order of magnitude of my attention span. It is a syrupy-thick liquid made by commercial evaporation of the mash liquid. The downside is that there are only so many different kinds of malt extracts so some recipes for particular beers or ales maybe a little more difficult but not impossible to achieve. And for those of us that really like to experiment, there are more things that get thrown into the mix to ultimately establish the character of your homebrew.
Hops.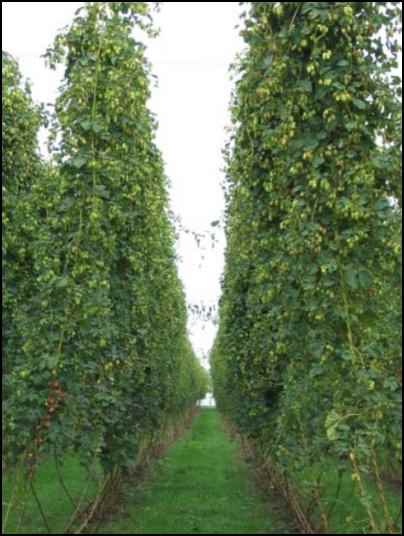 While malt equates to the body of the beer, hops are the spirit, the essence of the brew. Hops play a dual role in brewing beer or ale. They provide the characteristic bitterness of the brew comfortably offsetting the sweet malty flavor of the brew. They also provide the unmistakable aroma in a quality beer.
Hops are the cone-like flowers from Humulus lupulus, a vigorous perennial vine grown in many places across the globe. There are many varieties of hops, some subtly different, some major excursions from blandness. From the brewer’s standpoint, they are classified by their concentration of alpha-acids and oil content. A high alpha hop is used more for imparting bitterness to the beer whereas the lower alpha-acid containing hop typically contains a higher concentration of aromatic oils. The lower alpha-acid variety of hops are added in the later stages of the wort preparation to produce the characteristic beer aroma. It is not uncommon to find recipes using both types of hops in the same brew.
Oddly enough, historically, hop additions to beer and ale came about not for flavor or aroma’s sake, but for its preservative properties.
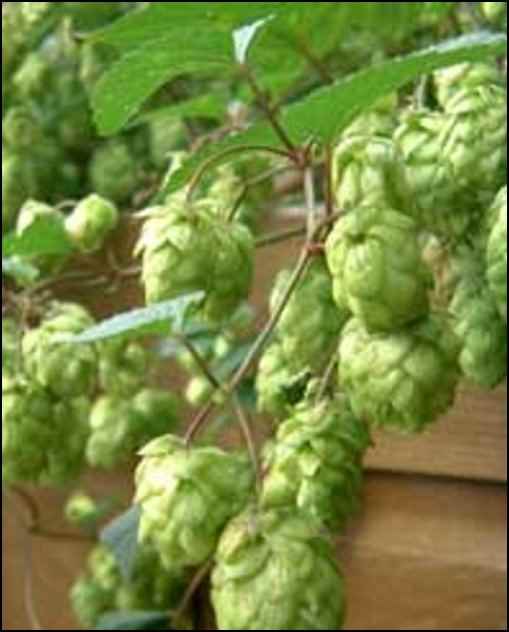
The aromatic hop oils are not very water-soluble; the alpha-acids are not extremely soluble either but more so than the oils. Isomerization occurs at elevated temperatures in the wort and this helps to increase the solubility of these components. Because of the low solubility in water, most recipes call for boiling the wort when adding hops directly. The aromatic hop oils, unfortunately, are quite volatile so they have a tendency to boil off. Therefore, hops for aroma are added at the late stages of the wort boil to minimize the oil loss.
A Cottage Industry? Hops have been hard to come by these days. I’m not sure why although I suspect crop damage out west. Hop vines are hardy plants and grow vigorously to 20 feet or more each year, then die back in the fall. You can actually measure the growth in inches each day! Beautiful climbing vines give both shade, beauty, AND hops! They are cold hardy and grow in most soils anywhere from 30-55 degrees latitude. They need sun and 120 days of frost-free growth to produce cones. Hop vines are dioecious plants meaning only the female bears cones. They do not even require a male plant to set cones! Hmmm! No males need apply!
I’ve started my own hop growing area with several varieties. They propagate by rhizome so are capable of producing more plants each year. This could be a reasonable cash crop or cottage industry for some homesteaders with time on their hands and a small well-drained sunny spot. Hops prefer to grow vertically (12-25 ft) more so than horizontally. Check out the references for growing hops at the end of this article.
Yeast. Malt is the body, hops are the essence, and yeast makes it all possible. Beer making has been an essential part of cultures even back to the Egyptian pharaohs. Yet is was only in the 19th century when Louis Pasteur (Uncle Louie in beer making circles) discovered it was not magic, not God’s will, nor “spontaneous generation” of microscopic beer animals that produced beer. It was actually microscopic, naturally occurring airborne plant organisms, yeasts, that were responsible for the metabolic reactions for transforming sugars of varying complexity into carbon dioxide and ethyl alcohol.
Prior to Uncle Louie’s input, beer making, as essential as it was to civilization (see the sidebar Ale and Freedom), was often a hit or miss proposition. Early Brazilian Indian beer makers would use their own form of “Uncle Looey” to make their “all-natural” beer. This 17th century engraving shows what looks remarkably like the loveable Twombly twins I once knew, chewing on some substance and then hurling or otherwise ungracefully depositing the chewed “whatever” in the form of a “looie” back into the churning vat of wort. Whoa! That’s all-natural brewing to the extreme!
I’m reminded of Crazy Francis, an old heartthrob of mine from yesteryear. One in a million as I recall, she had such a virgin-clean palette. Crazy Francis refused to drink anything but Molson Ale and my goodness could she consume Molson Ale. Even though I was somewhat afraid of her, if I were to brew an all-organic beer today, without hesitation, if I could find her, I would let her inoculate my wort.
Yeast for brewing comes in two distinct styles; top fermenting (ales) and bottom fermenting (beers) although it is not uncommon for both activities take place from the same strain. It is the yeast that determines whether you brew beer or ale. Bottom fermenters generally do well in colder fermentation environments whereas top fermenters would slow down and quench the process below 65F.
The yeast actually imparts a subtle flavor to the brew. Often you will hear of a fruity, citrus, or even doughy character ascribed to a brew. These subtle refinements are brought on by the strain of yeast used. It’s a porous boundary between civilization and the wild so sometimes wild yeasts produce distinctive flavors for better or worse as well.
It is worth experimenting as you get more experience in homebrewing with various strains of yeast. But do stay away from bread yeast and unless you run into Crazy Francis, refrain from using spit!
Water. A whole volume could be written about water and beer but unless you are using advanced brewing techniques like mashing your own malt, water is water, and at least with malt extract brews, does not make an overwhelming contribution to flavor. It can be troublesome if the water is exceptionally hard or highly laced with minerals, for here it will affect the head retention properties of the brew. It could impart an off taste to the finished brew if the mineral content is too high. A rule of thumb for extract beers is: “If the water tastes good, so will the beer.”
Recipes. 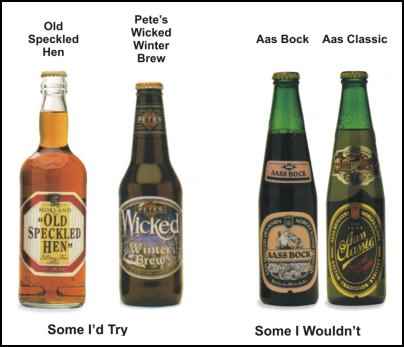 There’s been a resurgence of small microbreweries around the world offering a tremendous selection of brews available. Some good, some bad. Some brews are worth emulating, others… well, I might stay away from just based on the name.
On the internet, you can find hundreds of beer recipes to try. See the references at the end for some. Some recipes try to emulate commercial products, for instance, there are a couple that claim to be a fair representation of “Pete’s Wicked Ale”; one involves mashing your own malt the other uses extract and dry malt that has already gone through the mashing process for you. Pick out one and try it.
Experiment, take good notes, and may your yeast always flocculate well.
Four Weeks Later
In the end, I ran out of patience after 34 long, thirsty days. With only occasional tapping off some beer from the carboy dispensers (for quality control purposes I might add), the time for consummation had come. And the anguish was well worth it.
Both the kit beer (Cooper’s Lager) and the medium-bodied “grocery-store malt” beer were a delight.
The lager mellowed substantially over the cool 21-day storage. It clarified nicely, and produced an aromatic lager style beer with a robust head and a strong bitterness; perhaps a tad too sharp but very refreshing. It was crisp, light, and turned out to be a great companion to a pizza.
The “grocery malt” beer was darker than expected and pleasantly sweeter. It was heavy-bodied, more so than the lager but smooth, with a nice malty flavor. It produced a frothy light head and was superb alongside a steak dinner.
I will definitely brew from both of these recipes again.
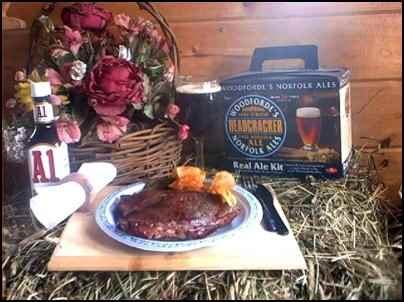
The kit shown in the picture is one I bought for my next brewing experiment. With a name like Headcracker Ale, I wasn’t sure what to expect. Then it came in the mail. “Oh Lordy,” said I, “it looks awful strong.” so I prayed for some heavenly guidance to brew this one. After opening the box and upon deeper reflection on the nature of this brew I added to my prayer… “Perhaps Lord, you’ll give me the sense not to even try this!”
The Very End
Everything in moderation. You can only cheat the government so much. If you sell homebrew or produce over 200 gallons a year, you may be visited by Elliot Ness or one of his revenuer grandkids, those barrel-chested fools with heads that look like inverted pails wearing hideous suits bought from a poorly lit garage sale in Chicago.
Elliot will arrive even sooner and a great deal madder if you decide to distill your homebrew.
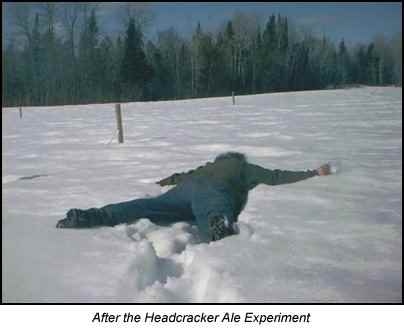
And lastly, should you garner the strength of conviction to attack something like Headcracker Ale, have fun but please, be responsible.
Ale and Freedom
There are theories that ale was the real cause of “The shot heard ’round the world” on the Lexington Green that fateful day in April 1775, the shot that started the Revolutionary War.
The theory propounds that Minutemen, an earthy collection of more or less roughhousing, gun-toting, always-up-for-a-rabble but extremely patriotic Americans of ’75 were awaiting the arrival of a marching column of redcoats. What better way to calm jumpy nerves while waiting for a good showdown than to go into the then, adjacent to the green, tavern for a belt or two of ale. And so some did. Probably most. One was said to stumble and otherwise lose it coming out of the tavern when the redcoats showed up. His gun went off… and America was liberated.
References and Additional Sources
Brewing Non-alcoholic Beer http://byo.com/feature/66.html
Hundreds of homebrew recipes: http://hbd.org/brewery/cm3/CatsMeow3.html
How To Brew, John Palmer free e-book: http://www.howtobrew.com/
Hop Vines: http://www.botanical.com/botanical/mgmh/h/hops–32.html
Hop Gardening: http://www.freshops.com/gardening.html
Small Scale and Organic Hops Production: http://www.crannogales.com/HopsManual.pdf
Beer and Wine Making Supplies:
http://www.beer-wine.com/category_page.asp?categoryID=155§ionID=1
Headcracker Ale kit: http://www.beer-wine.com


Take the alcohol from beer?BLASPHEMY!~Great article,thanks.