After a busy and productive spring and summer growing season, it is tempting to plant fall crops and consider resting until spring. There are plenty of fall chores you can do before the spring seed catalogs arrive that will help you get a head start on your garden. By doing a little each day in autumn, your homestead will be ready for another productive growing season as soon as you can work the ground in early spring.
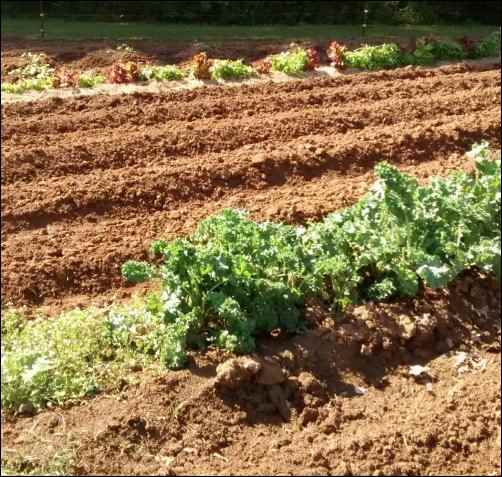
First, let’s consider the fall garden. Many fall gardens fail because the seeds are not planted properly. The instructions found on the back of seed packets only apply to spring crops. When you plant fall crops in the heat of summer, you must plant the seed an inch deep to ensure you have a healthy root network before the first sprout shows itself. Germination will take two or more weeks, but the plant will be able to withstand a variety of harsh conditions.
Once your fall seeds are safely in the ground, there are monthly chores that will keep you busy and your garden healthy.

Fall Chores in September
- Plant garlic cloves.
- Record your summer vegetable plots while they are still fresh in your mind. Eggplants, peppers, and tomatoes should be rotated, as should beans.
- Plant daffodils. Soak the soil in your daffodil bed weekly throughout fall.
- Move any houseplants that have been summering outdoors back inside.
- Sow a green manure cover crop where you want to enrich the soil for spring planting. You can plant any of the fast-growing members of the grass family, such as annual rye grass, barley or oats, or the legume family, such as clover, vetch, broad beans or peas. This crop will be tilled into the soil a month before planting time. Although the top growth will be sparse, the well-developed root system will add plenty of organic matter into the soil as it decays.
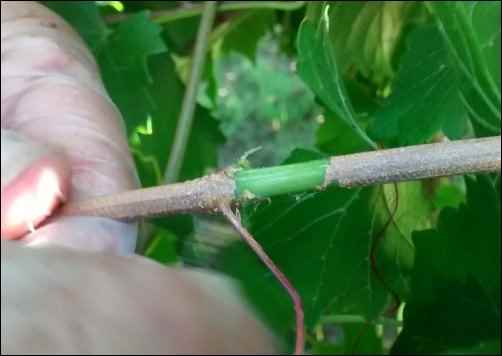
- Take softwood cuttings from woody herbs. Softwood cuttings are taken from the healthy sideshoots of the current season’s growth. The new growth is not very young and soft, but it is not hardened and woody either. Cut the shoot where it meets the main stem, making the cutting 3-6” long. Place the cuttings in a plastic bag as soon as you cut them so they do not dry out. When you have all the cuttings you want, remove the leaves from the bottom third of the stem and place in moist potting soil immediately. Set the cuttings far enough apart so the leaves do not touch. Keep the soil evenly moist throughout the rooting period.
- Plant any potted perennials, shrubs or trees. Established perennials will outperform those planted in spring.
- Mulch blueberry plants with pine needles to keep the soil acidic.
- Harvest sunflower seeds for feeding the birds or for next year’s flowers.
- Stake tall shrubs and young trees to protect them from winter storms.
- Plant pansy seeds in a spot that gets morning sun and afternoon shade.
- You can begin planting spring bulbs now.

Fall Chores in October
- Start your Christmas cactus on its blooming schedule. Chill for three consecutive nights by placing it in the trunk of your car in the evening and returning it to the house in the morning. At this time, the plant should spend the day in the warmest room in the house, with bright, indirect light. As long as the nighttime temperature is at least 20 degrees lower than daytime temperatures, the plant’s biological clock will start ticking. After the plant has undergone the three-day chilling cycle, keep it in bright, indirect light, at 60-70 degrees Fahrenheit.
- Transplant all cuttings.
- Prune stalks of summer perennials. In the North, cut back stems 3-4” from the ground. In warm climates, cut back to 2-3”. Do not cut back shrubby plants until early spring.
- Mulch around perennials.
- Plant any hardy annuals. In cooler climates, they will germinate and bloom in spring. In warm climates, you will get a winter bloom.
- Pull annuals when killed by frost or when they tire out and quit blooming entirely. Put old plants on the compost pile.
- Water June-bearing strawberry plants periodically until Thanksgiving.
- Bring in stakes, row covers no longer in use, and garden netting.
- Scrub, disinfect, and store clay pots. To disinfect, soak in a solution of nine parts water to one part chlorine bleach.
- Clean, oil and sharpen tools.
- Rake and collect leaves to use as a winter mulch or as a foundation for your compost pile. Shred the leaves and wet them to promote leaching and rapid decomposition. You can till shredded leaves directly into your garden soil.
- Dig up any tender bulbs. This is not necessary if you live in an area that does not get ground freezes. If the ground does freeze in your zone, dig up your flower bulbs, shake gently to remove excess dirt, and store in a mesh bag in a cool, dry room until spring.

Fall Chores in November
- Remove any vines that have climbed up tree trunks. Wear gloves for this chore – a lot of those vines may be poison ivy! Vines should be disposed of via the burn pile. Do not add them to the compost heap.
- Relocate Christmas cactus to the coolest room possible, with indirect sunlight. This is where your cactus will bloom so put it where you want it. Moving it once it blooms will knock off the flowers.
- Trim the ends of raspberry and blackberry canes back by 12”-16”. Remove any unwanted suckers at this time.
- Take 5” stem cuttings from gardenias to create new plants for next spring. Root the cuttings in plastic pots filled with potting soil. Keep these covered with plastic for 4 weeks.
- Clean birdhouses.
- Apply 3”-4” of mulch around June-bearing strawberries.
- This is your last chance to plant spring bulbs.
In addition to these general chores, you can start a compost pile and create garden beds that will be ready to use in spring.
To start a compost pile, spread a layer of plant material such as leaves, weeds, or grass clippings on the ground or in a bin. Chop large plant material into small pieces and mix with finer weeds and grass clippings. Top with shallow layers of manure or a few handfuls of nitrogen-rich fertilizer, topsoil, and kitchen scraps (no meat, dairy, fat or bones). Continue adding layers until the pile is 4′-6′ high. This size will hold the heat necessary for decomposition while still allowing enough airflow to minimize odor. Keep the compost moist but not soggy. Cover the compost pile with a tarp or sheet of plastic during a heavy rainfall.
Turn the pile every three to four weeks. This will help to discourage odor and flies, as well as to encourage even decomposition.
You may find you need to add small amounts of nitrogen periodically to keep the decomposition process working. Simply add some fresh manure or blood meal to the layers.
Your compost is ready to use when it is very crumbly and the materials you started with have decomposed beyond recognition. This usually takes about three months. Sift compost through a coarse, 1” mesh screen to remove any large pieces that have yet to break down.
To easily create a new garden bed, layout the perimeter you want using stakes and string. Remember when choosing the location for your new bed that vegetables, herbs, and flowers need a lot of sun. Once you have your perimeter staked out, set your lawnmower to the lowest possible setting and mow inside the perimeter as short as possible. There is no need to remove the clippings.
Once you have mowed inside the perimeter, water the area thoroughly then cover with a thick layer of old newspapers. Water again, saturating the newspapers until they are flat and heavy. Stomp on the papers to ensure they are in close contact with the soil.
Cover the newspapers with long, overlapping strips of a woven weed barrier. Weigh down the side and overlapping edges with bricks or stones. Do not use black plastic. For this technique to be effective, your garden bed must receive rain and air.
In two to three months your new bed will be clean and ready for planting. Simply roll up the weed barrier and store for later use. Remove newspapers and dry before burning. If this bed is for flowers or vegetables, you can add manure or compost. There is no need to dig it in. Apply it to the top of the bed and scratch it in with a garden rake. If this will be an herb bed do not add any manure or compost.
Have fun this fall planning and working on next year’s garden. Although hibernating through fall and winter may sound warm and wonderful, you will be proud of yourself and your garden come spring.


